PRACTICAL STITCHING - getting started
Like the historical modelbuchs, Practical Blackwork designs generally don't specify fabrics, threads, colors, or sizes - we want the stitcher to be free to create a personalized Beautiful Thing.
There are a great many tutorials (check our Links page!) and books that teach the fine points of stitchery in general and blackwork/counted work in particular. This page is intended to give a few pointers and practical tips, based on The Management's experience, for stitchers trying a Practical Blackwork design for the first time. Feel free to contact The Management at the link in the footer with specific questions.
1- CHOOSING FABRICS, THREADS, AND SIZES
All this is based on the use of your project. Clothing, table linens, etc, will need washing/cleaning at some point - choose fabrics accordingly, and threads that are pre-shrunk and colorfast. Wash your fabric BEFORE CUTTING in the manner you'll use for the finished project (serging or zigzagging the raw edges of your fabric will keep it from ravelling). Make sure your fabric is large enough to mounting in an embroidery frame (The Management likes a scroll frame for blackwork, less distortion of your ground fabric and stitches), as well as large enough to accomodate the finish you've chosen. Evenweave fabric is simplest to work, but not necessary for every design. Choose fiber content according to use.
Threads - generally speaking, counted blackwork looks best when worked with a single thread - rule of thumb is that the size of your working thread should be close to the size of the threads in your ground fabric. Thicker, thinner, and specialty threads can be used for specific effects. Choose quality threads and flosses, and buy more than you think you'll need; keep note of the brand and color number in case you need more.
Whether for clothing, linens, or framing, choose the highest-quality materials you can afford for your purpose. Nothing is worse than spending hours stitching, only to have the finished product fade, discolor, or fray away to nothing at the first use.
2 - TOOLS
You'll want a good quality embroidery frame of suitable size - a couple of inches wider than your fabric is great. Lay in a supply of appropriately sized tapestry needles - the eye should be big enough to thread easily but not so big you're rethreading all the time, and should be sized to pass through the holes in your ground without distorting them. Good sharp scissors are a must. A small pair with curved tips are best for snipping finished threads.
3-PREPARING FABRIC
After washing your fabric (if needed), you'll want to cut it to working size. (If you've purchased a pre-cut instead of yardage, you get to skip the cutting part!)
The size you'll cut depends on the size of your project, or in some cases the stitch count of a complete design. Evenweave fabric comes in a variety of thread counts -the most common in craft stores seems to be 28 threads per inch - we will generally work over 2 threads per stitch, so that means our fabric will be 14 stitches per inch. If working a design that is 100 stitches wide, divide 100 by 14 - a little less than 7.25". If adapting a design to a desired size (for instance, the Pascha Basket patterns from Catherine's Pascha) use this same formula to be sure the design will fit your size. Find the "Stitch count" of your finished project - for instance, a 10" x 10" project on 14stitch/inch fabric will require 140 stitches (or 280 threads) on each side.
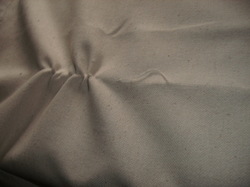
Press out any wrinkles or creases. lay your fabric out on a large flat surface.
Using a blunt tapestry needle, start drawing out a thread - this will insure that your cut is "on grain", and keep your finished work straight for sewing or framing. Draw this thread for the length of the cut you need to make.
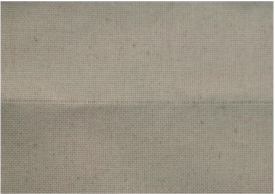
The drawn thread will leave a line like this - just follow it for a straight cut.
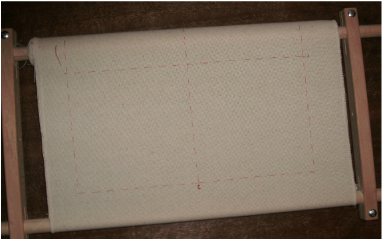
You can serge/zigzag your cut edges, or fold masking tape over them to prevent fraying while you're working. Once your fabrics is cut to size, mount it in your frame according to the frame's instructions. Roll it back and forth a few times to get it evenly distributed.
4-MARKING
Roll most of the fabric to one roller. Thread a needle with a brightly contrasting length of sewing thread, and put a big knot in the end.
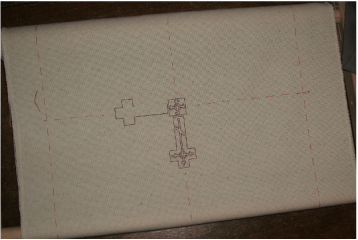
Find the center of your fabric with a ruler or tape measure. Start stitching here with your contrasting thread, counting out HALF the required stitches for your project (I like to mark in 5s or 10s). In this way, mark the outlines of your finished project and find the center , as shown in this photo.
"-STITCHING!
Once you've found the sides and center of your work area, you're ready to start stitching! Choose your favorite stitch and starting method (or check our links page for tutorials) and get started on your Beautiful Thing!
Remember when you put your stitching away to loosen the tension on the frame - leaving it tightened all the time will warp your stretcher bars and distort your fabric.
We're sure we've left out any number of things here that new stitchers need to know - please feel free to send any questions and reminders to the "contact the Management" link below, so that this page continues to improve!

